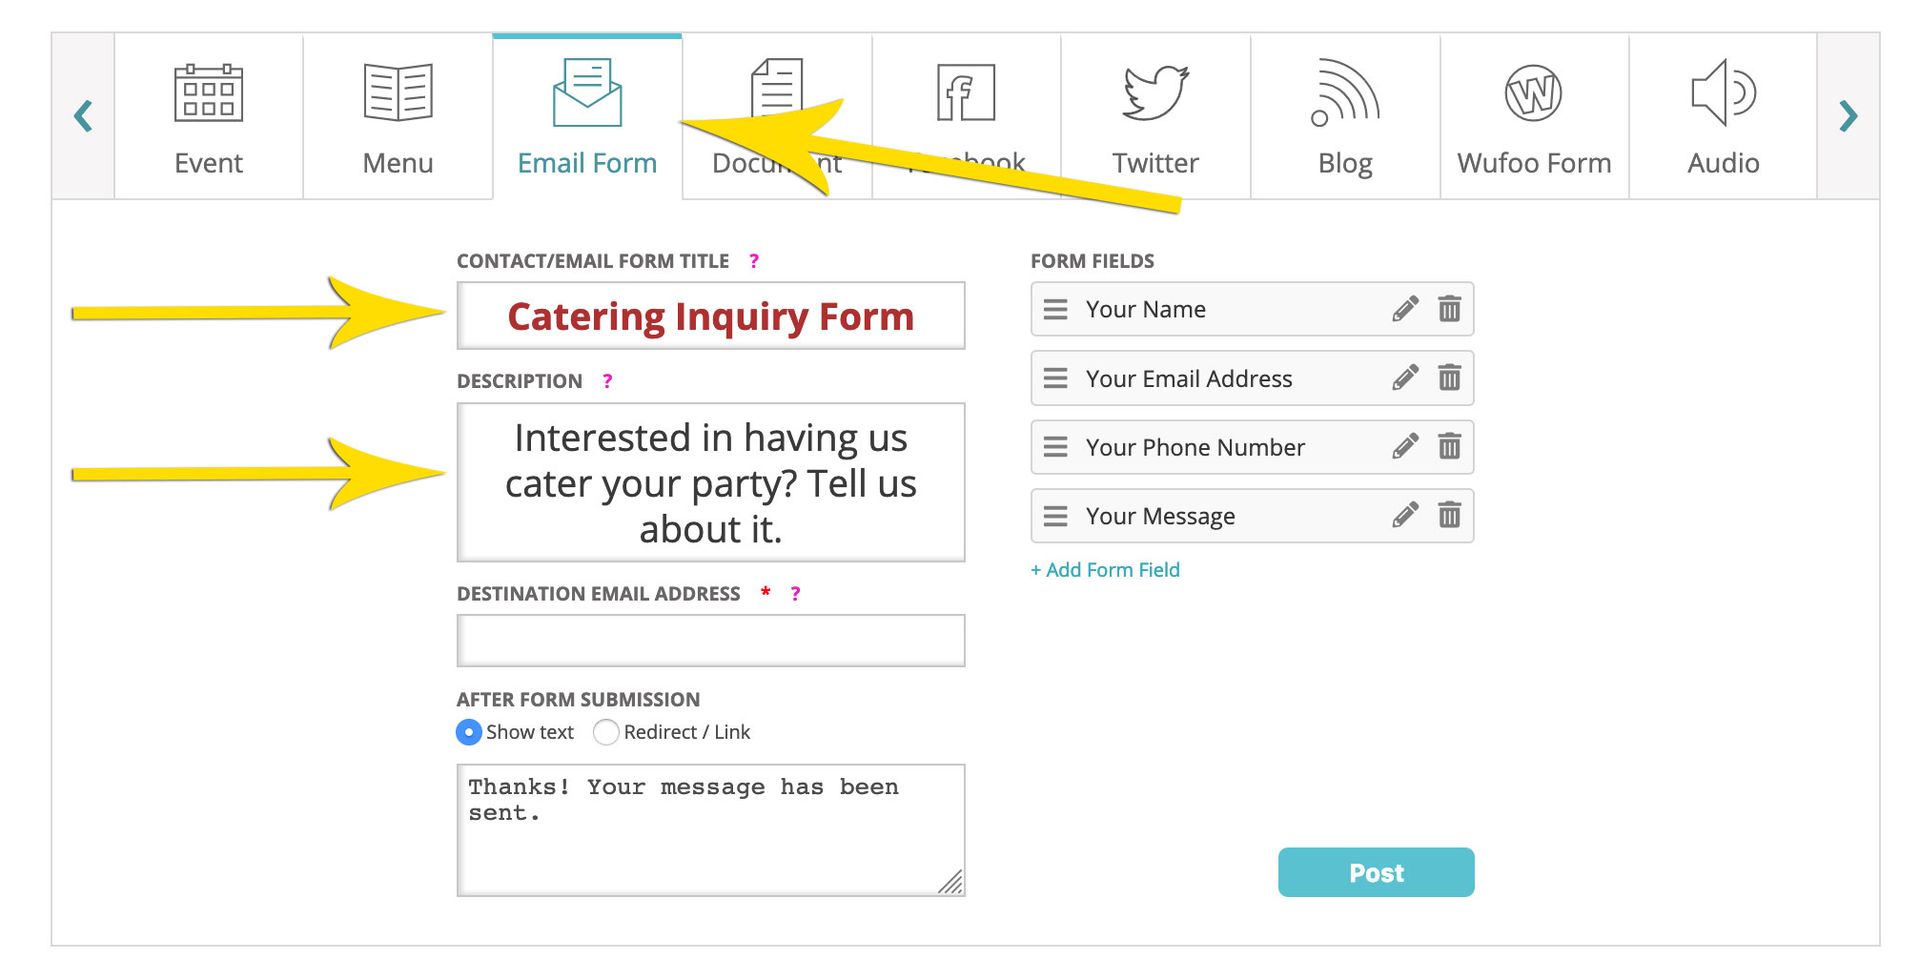
Looking to add a simple contact form to your website? Here's how...
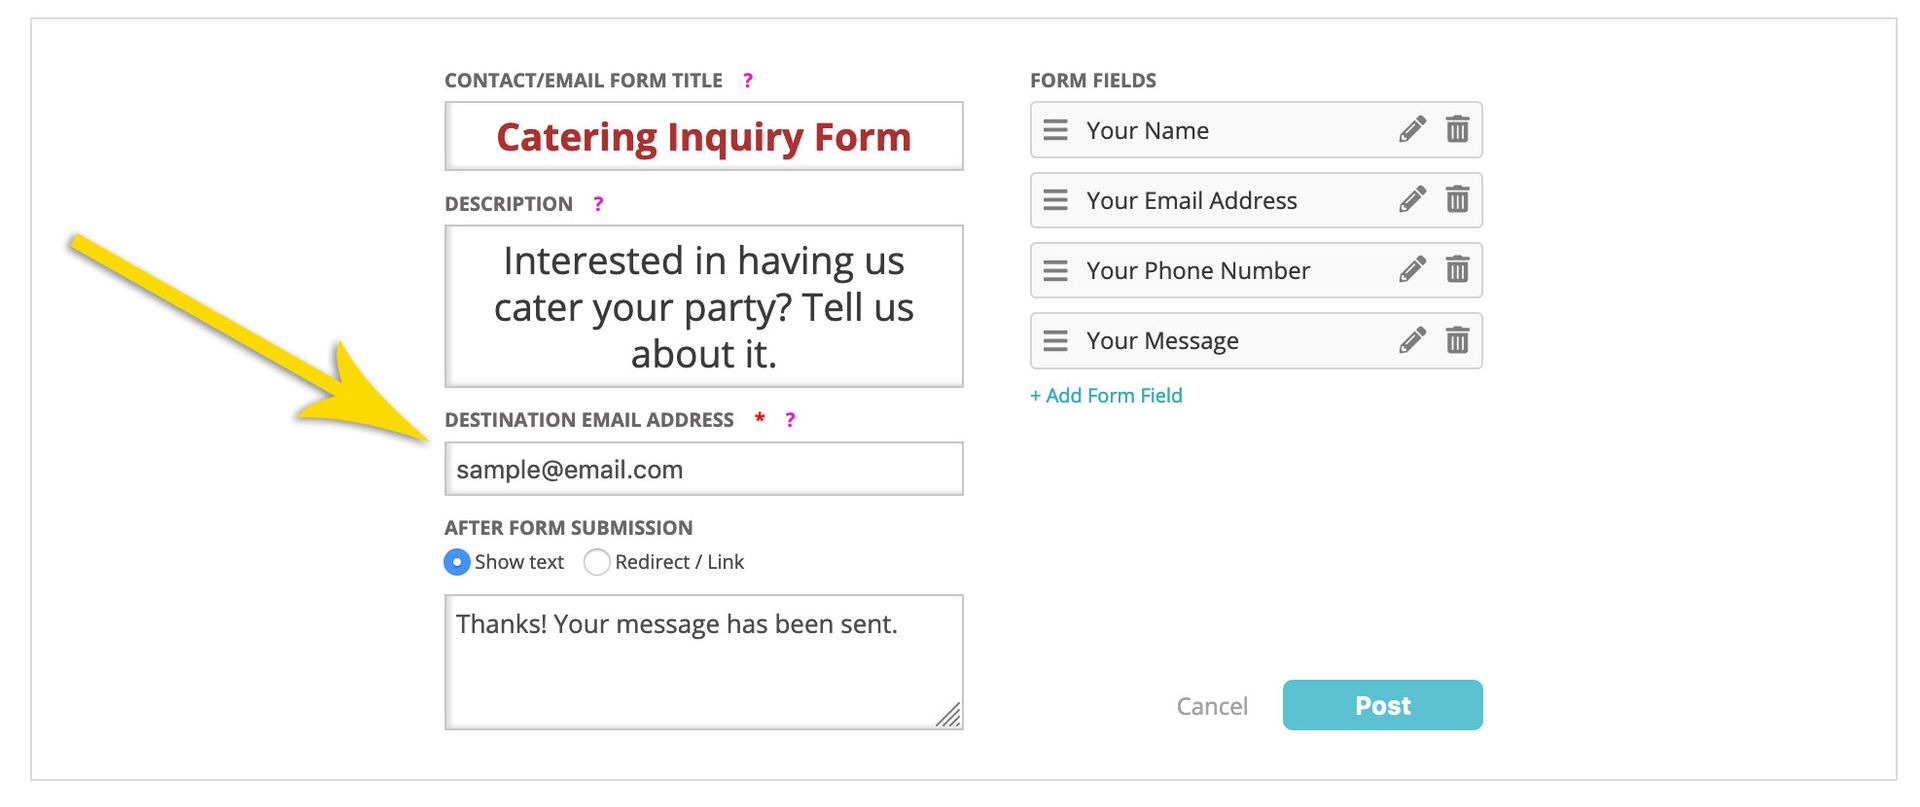
STEP 2 - Use the Destination Email Address field to enter the email address to which you want the messages to be sent to. Please make sure you have entered the correct email address otherwise you will not receive the messages.
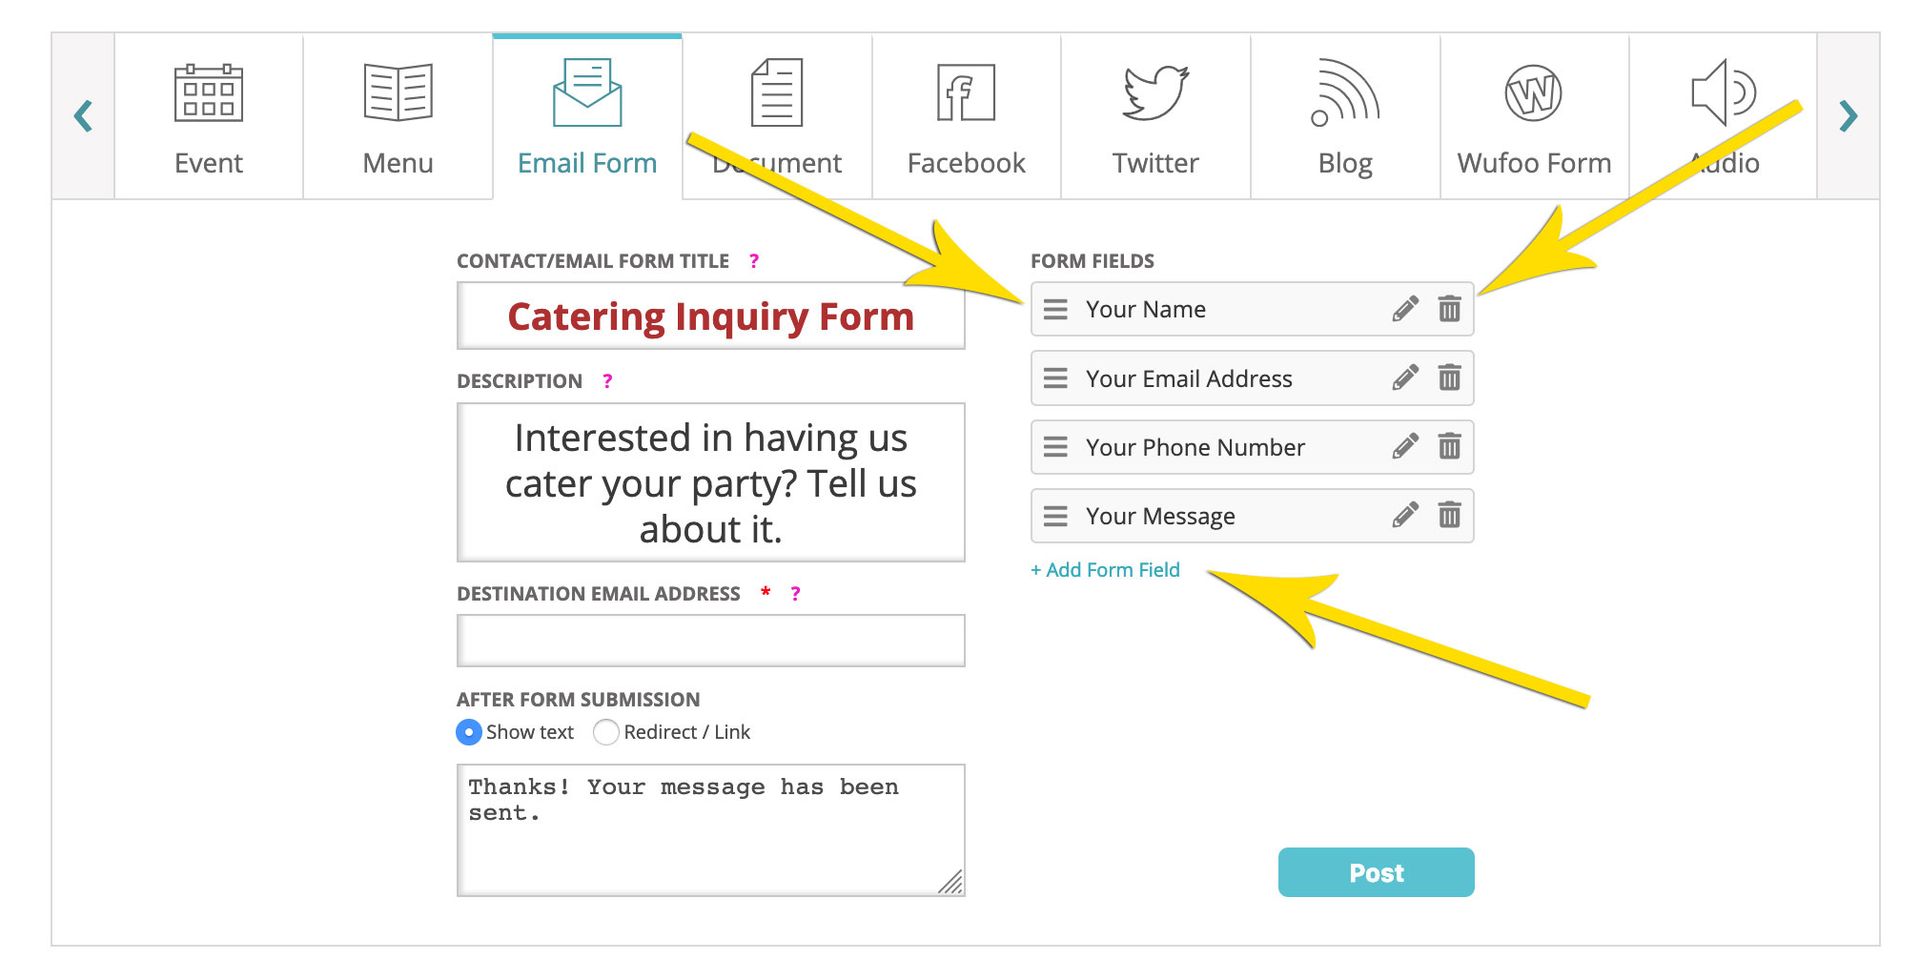
STEP 3 - For your convenience, Email Forms include some existing fields that can easily be changed. You can Reorder, Edit, Delete and Add New Form Fields at any time.
Drag and drop the three lines on a field to reorder a field.
Click the Pencil icon to edit an existing field.
Click the Trash Can icon to delete a field.
Click "+ Add Form Field" to add a new field to your form.
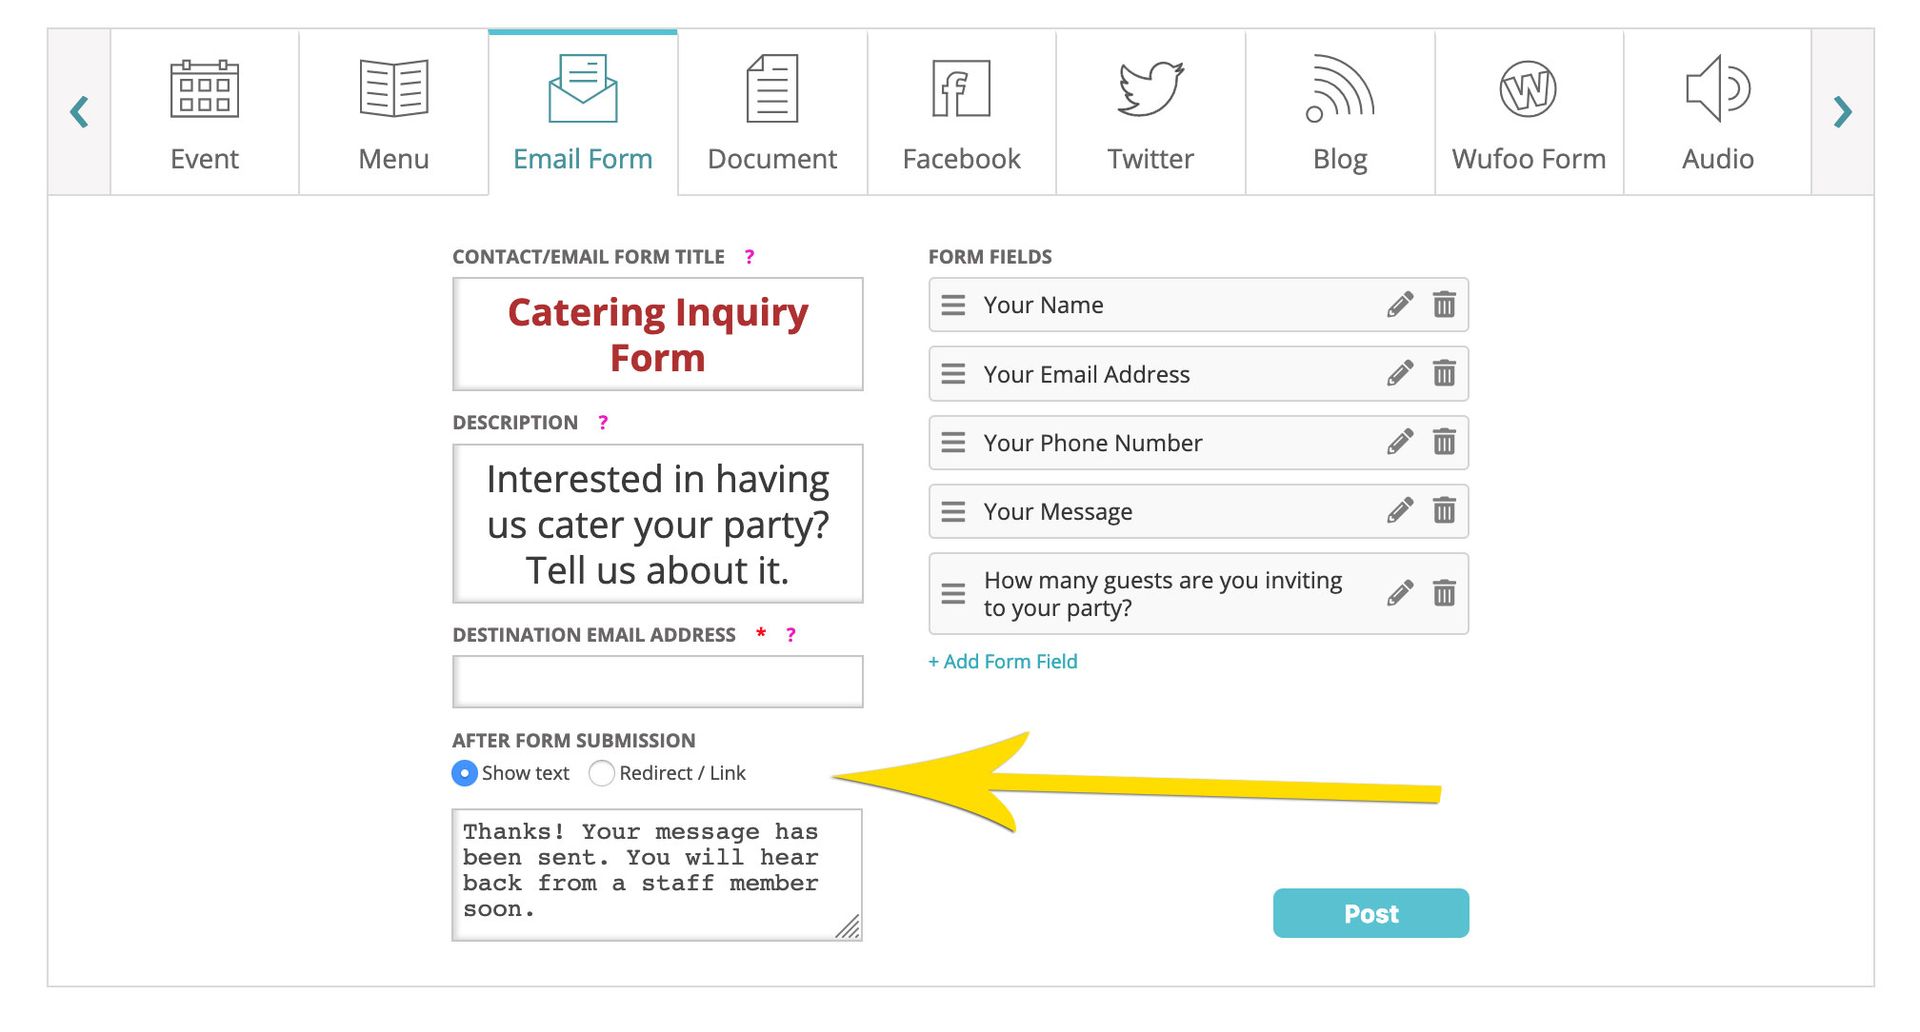
STEP 4 - When you Add a New Field to your form, you can enter a title or "Label" and choose the type of field it is and if you want to make this a "Required" field. Required fields must be submitted by the user in order to complete the form.
Single Line Text is perfect for fields that require short answers such as "Your Name" or "How many guests are you inviting to your party?"
Multiple Lines Text fields are taller and are generally used for fields that require a few sentences such as "Tell us a little about your business" or "List the dishes you are interested in ordering for your party"
Phone Number fields are used for requesting a phone number.
Email Address fields are used for requesting an email address.
STEP 5 - You can change the text that is displayed after a visitor successfully submits a form or even redirect them to a different page/URL. Press "Post" when you are done.